Wednesday, July 21, 2010

Simplicity 3967

I bought this pattern from one of my favorite Etsy sellers, Midvale Cottage:


I made view 1 using a printed cotton and pink satin bias tape:


The pattern was very straight-forward to work with, but I'd sorta lost my sewing mojo so it took me a while to finish the dress. I wore it to a wedding last weekend, but apparently I'd also lost my blogging mojo, that's why it took me so long to get this posted, hehe.

This pattern is very similar to another wrap dress pattern I have previously made, namely Butterick 6914, but the construction of Simplicity 3967 is a lot better in my opinion. An example of this would be the fact the grosgrain ribbon used for the fastening of the back piece also works as a waist stay (I do apologize for my wonky stitches):


In comparison, the back piece of Butterick 6914 has no waist stay and just a little elastic to fasten it in front. Another problem I had with Butterick 6914, which I intend to correct, is how unruly the neck opening got because the instructions didn't mention anything about facings, although that probably would have been a good idea. While the instructions for Simplicity 3967 didn't call for any suppoort for the neckline either, I decided to apply a facing with fusible interfacing to the sweetheart neckline to have more control when sewing on the bias tape, and it worked like a charm. If you're going to make this pattern, I would recommend making some kind of facing with interfacing or maybe using stay tape. Whatever suits your fancy :)

Other than the addition of facings, I made the following alterations:

Shortened the skirt of the front part by a couple of inches.

Used bias binding instead of making a hem.

Used three sets of snaps instead of the suggested set of a hook and eye to fasten the back piece. I figured it would be a plus to be able to adjust the tightness of the back piece.

Made a series of small pleats when gathering the bust instead using the suggested gathering stitch.


So, what's up next? Well, I've just finished pre-shrinking the fabrics I'll be using for my summer projects, so now I just need to trace the patterns as I go. I hope to have at least one summer outfit finished by the end of this week, hopefully more :)

Monday, July 5, 2010

Summer Essentials Sew-Along

I signed up for the Summer Essentials Sew-Along back in the beginning of June and now I'm ready to reveal what patterns and fabric I'm going to use. Sew-alongs aren't normally something I sign up for, mainly because I often find the deadlines too strict for my busy studying schedule. But now I've got two months till I go back to school, so this sew-along seemed just right and I thought it would be a great way to get some summery sewing done without non-summery projects getting in the way. Here's the categories and my choices:

Poolside Pretties: Anything that cools or dries you off when there’s lots of sun and water around. One and two-piece swimsuits, swimsuit cover-ups, surf shorts, sun hats, oh my! One versatile swimsuit cover-up I find lovely is a terry cloth dress. Double-duty, that’s what I’m talking about.


The fabric is a printed cotton. I'm planning to make view 1 and wear some bikini bottoms in matching colours underneath. I'm not really that hot for the bikini bottoms in view 2, but I'm not ruling them out completely :)

Clam Diggers & Co.: Bifurcated bottoms of every style and length, from flowing linen pants to short-shorts and all the inbetweens—clam diggers, pedal pushers, Bermuda shorts, etc.


The fabric is again cotton. I bought this fabric ages ago, intending to make some pedal pushers, but just never got round to it, so I thought this sew-along was a great way to get them checked off my list. Seeing as I'm going for pedal pushers, the length will of course be shorter than what the pattern suggests, but this is the only pants pattern I have that fits my measurements as it is :P

Sweet & Sassy Skirts: Prints and solids, short and long, low-slung and high-waisted. But most of all: Airy, flirty, flattering.

When I wear skirts, they're usually pencil skirts. Whenever I wear something with a fuller skirt, it's usually a dress, so I'm skipping this one and saving the fuller skirt for the next category.

The Sundress: Need I say more? To me, the perfect sun dress strikes that cord between casual and elegant—arms and collarbones, looking good barefoot or high-heeled. It’s something you can wear to both a barbecue and a summer wedding. A summer staple I’ve never owned until now.


This fabric is a lightweight half panama weave. I intend to make view A with the straps and band in white cotton. While I'll be making other dresses this summer, I wanted my entry for the sew-along to be the summeriest design I could possibly think of and this pattern and fabric combo was it.

Tees, Tunics & Blouses: Yes, please! I’m finally understanding the worth of blouses as they also strike that balance between casual/formal, totally versatile. I’m also thinking mini-dresses that do triple duty as tunics, dresses and cover-ups.


You might have noticed that this pattern doesn't quite fit the description for this category. Seeing as I don't really wear tunics and the likes, I decided to do a little creative interpretation of this category; I wanted the pattern to be something that could be used both casually and formally, as well as being super comfortable in the summer heat and a halter top was what I arrived at. I'll be making view 1. I don't know what the fabric is, it has a significant amount of stretch and the weave reminds me of denim. If you view the full-size photo, you'll see it's flecked with cobbery thread.

Those Summer Nights: Pullovers, cardis and hoodies may be the last thing you’re thinking of with the mercury rising, but there’s those cool summer nights, not to mention every last establishment with the air con blasting. Or: for those of you where thunderstorms are a daily summer experience, a lightweight trench?


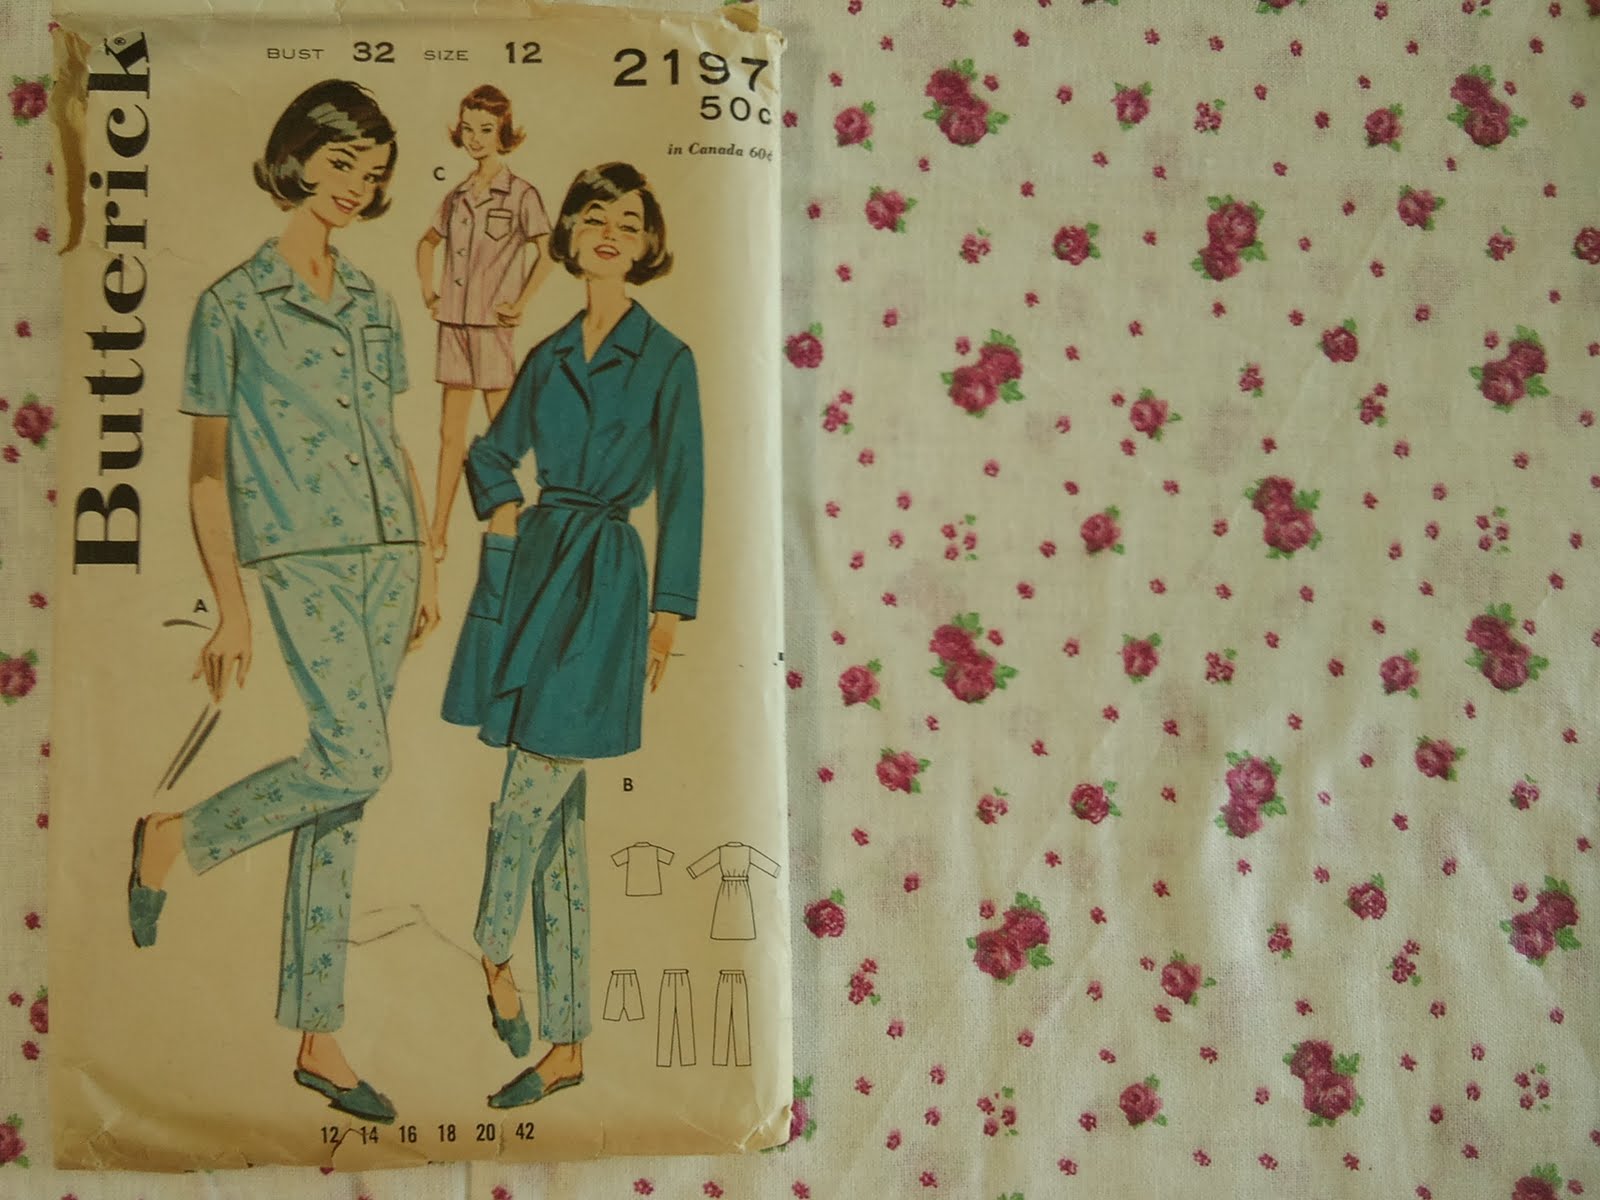
I'm going for view A. Long pajama pants may seem a little weird for summer, but I think this outfit will be quite nice for breakfast on the balcony and snuggling up with my fella on the couch for a scary movie during a thunderstorm. The fabric is actually a bedsheet I bought at the local supermarket... Seems kinda appropriate to use it for a pajamas, eh? :D

This is what I have planned so far. I may make a skirt if the right fabric and pattern turns up. Some short shorts is also an option. Another halter top isn't ruled out either and there'll definately be more dresses, starting with a wrap dress I'm making for a wedding I'm going to next week. I also intend to make the sailor playsuit reproduction from Wearing History on Etsy, but I didn't know what category it would fit into, so that's just an extra feature :)

Butterick 6836

There's just something about wrap dresses that make them irresistible to me, so I was very happy when I stumbled upon this pattern at VintageDressmaking on Etsy at a very favourable price:


The design is significantly similar to that of Butterick 6015, but the construction of Butterick 6836 seems to be a bit better and I think the collar is a great addition. Another plus about the the design of Butterick 6836 compared to many other wrap dresses of the 1950s, is that it doesn't use the usual "pencil skirt with an overskirt"-design, which usually rules out using a crinoline. While I don't tend to wear crinolines, it's always nice to have the option to use one and the design of Butterick 6836 makes the use of crinolines possible. Anywho, here's the results of my attempt at this pattern:


Due to the season I decided to use all cotton. The floral fabric is from Michael Miller Fabrics and it's called China Garden. I found it on sale earlier this year and I'm so happy I bought a couple of yards, it looks particularly beautiful on the back of the dress:


The pattern was pretty straightforward to work with. The only alterations I made were:

Grading the pattern up to a vintage size 14.

Making the shoulders a little narrower.

Taking off a couple of inches in the length of the skirt because the fabric wasn't very wide.

Using bias tape instead of doing a hem, again because the fabric wasn't very wide.

Using four sets of small snaps instead of the two sets of hooks and eyes suggested to fasten the front bodice in the back.

I had some concerns as to whether the front bodice would ride up, but I wore the dress last night and had no problems whatsoever, so using snaps instead of hooks and eyes probably wasn't a bad idea. Another concern was how well my bound buttonholes would turn out; the last time I did bound buttonholes was about 6 years ago, but I'm pretty pleased with how they turned out :)

So... What's up next? Well, seeing as I passed all my exams, I've been planning what contributions I want to make for the Summer Essentials Sew-Along, so stay tuned to see what patterns and fabric I have chosen :)

Monday, June 21, 2010

Butterick 6063 (frankensteined)

I had a little time between exams to have a go at this lovely pattern that I bought from Midvale Cottage on Etsy a few months ago:


The fabric was thrifted and I only had 1.5 meters of it, so I decided to use the pencil skirt pattern from Simplicity 1412 instead:


I must say I'm really pleased with how the fusion of these two patterns turned out. While the blue spinlon fabric is quite thick, it is nowhere near as thick as the cotton I used for my first attempt at Simplicity 1412, so I decided to do the kick pleat originally suggested for the pencil skirt:


You might notice that there's a couple of dark horizontal stripes across the back of the skirt. They fit with how the fabric was folded when I found it and I suspect them to be related to age (the fabric is most likely from the 1960s) as well as poor storage conditions, such as too much exposure to sunlight and/or uneven temperatures. I don't mind them much as they are only on the back of the skirt, but I would still be happy to get rid of them. Anybody have any suggestions? :)
All in all, Butterick 6063 was a pretty straightforward pattern to make and I'm really pleased with the results. Seeing as the size is a vintage size 12, I had to add 2 inches in the body to bring it up to a vintage size 14; this was achieved by adding an inch down the middle of the back and a half an inch to each of the side seams of the front bodice. Sewing wise, the only really tricky bit was attaching the collar to the lapel, which I decided to do by hand for the most part.
This past weekend me and my boyfriend went to the Bedrock Weekend, an annual rockabilly event in Denmark. I got some very flattering compliments about the dress from some gals who were surprised that it was homemade. It even caused a few wolf whistles, too!

While the bodice pattern calls for buttonholes, I cheated and went with snaps instead, because I haven't done bound buttonholes for like 6 years and I didn't want to risk ruining the fabric with my clumsiness. I did, however, sew on these fabulous vintage 1950s plastic buttons from rakubuttons on Etsy for detail:


The exam season is coming to an end for me and supposing all goes well, I'll be able to sew more frequently and thus present you with more frequent blog posts. I've signed up for the Summer Essentials Sew-Along and I already have several summery projects lined up :)

Thursday, May 27, 2010

Butterick 6020

The pattern:


Front view of the finished dress:


And the back:


The fabric is a cotton with a little bit of stretch. I can't really say for sure as it was thrifted.

This was my first time matching stripes like this. Fortunately, the process is often described in especially older sewing books, so I had come across it previously. I do, however, owe some thanks to a friend of mine who helped refresh my memory. She also said it was a good idea to write on the pattern which colour each stripe was, seeing as I was dealing with three different colours of stripes. Here's a picture of how it looks on the pattern piece (note: the placement of the pattern on the fabric in the picture below is completely random, the fabric merely serves as a background):


It's pretty simple to do and I was very pleased with the result. What you do is you place the pattern piece on the fabric according to what the piece dictates with regard to the straight grain of the fabric. Then you take a ruler and draw lines on the pattern piece that are a couple of inches long, or whatever you find best, representing each stripe. Then you turn the pattern piece to make sure you get a mirrored piece, making sure the stripes match each other in colour. I had to turn the piece around by 180 degrees, because the fabric had three different colour stripes.

The pockets are the really special thing about this dress. I decided to sew them on by hand because the fabric had a tendency to crawl together when I used a sewing machine, so it took a while, but it was pretty straight forward. If i make the dress again in a fabric that is easier to work with, I will probably use a sewing maching to attach the pockets. Here's a close-up of them:


All in all, this pattern was a positive experience, albeit demanding due to the stripes. I often use size 14 Butterick patterns from the early 1950s and I usually have to take them in a little. This one, however, seemed to run a bit small, but fortunately it all worked out.

Thank you for reading :)

Tuesday, May 25, 2010

Simplicity 1412

Things have been very busy lately with exams taking a much bigger toll than I expected, so all my sewing projects have been delayed by about a week, but at least I finally have time to post the results of my attempt at Simplicity 1412.

Here's the pattern:


Front view of the finished product:


Back view of the finished product:


I treated this as a sort of wearable muslin, seeing as I made no major alterations to the pattern, except for making a slit instead of the suggested kick pleat, because the fabric was too thick for the kick pleat to look good. I also omitted the welts as the thickness of the fabric wouldn't make them look good either. I found the fabric on sale, dramatically reduced, and I didn't use a zipper as the fabric is quite stretchy. It's a rather thick cotton, the type of cotton you use for sweat-shirts. As for the colour, it unfortunately looks somewhat grey in the pictures, but it is a green pastel colour flecked with silver thread.
I had heard many good things about this pattern beforehand and working with it was definately a positive experience. It came together quickly and the darts and soft pleats were all in the right places. Particularly the soft pleats at the front of the skirt are really flattering:


Although I like wearing foundation garments, many times I simply do not bother because I'm in a hurry or it's too hot, and then it is nice if the garment is constructed in a way that flatters the tummy area and the soft pleats of this pattern ceratainly do that. I have used a similar pattern that also had soft pleats in the front part of the skirt, namely Simplicity 2144:


The fabric I used for this pattern was boiled wool, which is also rather thick. The soft pleats ended up looking like this:


They're not as flattering for my figure as the ones Simplicity 1412 presented, so I think I'll stick to Simplicity 1412 from now on. I already have some leopard print fabric lined up for my next version of it. The only alterations I intend to make to the patterns is taking it in by a little less than an inch down the center front and the same down the center back and I 'll probably leave the welts out again.
I also intend to make the jacket included with Simplicity 1412, as I have heard many good things about that part of the pattern as well.

Lastly, here's a sneak peak of my current project, Butterick 6020:


I'm going to wear it to a dance I'm attending on Saturday the 29th, so at least I have a deadline for it. The results will probably be posted around the same time, maybe before, it all depends on how demanding my next exam is :)

Monday, May 10, 2010

"New" sewing machine

I've been so busy lately that I haven't had time to post anything on my blog. Not that I haven't been sewing, I made a kind of wearable muslin for this pattern:


I made view 2, but I omitted the welts. I couldn't really figure them out and the fabric I used was just too thick for them to look good anyway, so I decided that I wouldn't bother. Unfortunately, I haven't got any pictures of the dress yet, I'll need to persuade my boyfriend to take some.

Last week, I went to my parents' place for the weekend. As usual, I went through all the thrift stores in town and I found this beauty:


It is a Japanese brand called Koyo, which I know nothing about and doing a Google search on it didn't improve on my knowledge. I do however know that I'm utterly in love with it. I saw a similar machine at a flea market in the same local area last summer, and although they demanded a little too much for it, I was so frustrated that I didn't buy it. Then I found the Koyo and it isn't only similar in looks and age, it also works perfectly. There's even a foot for doing blind hems, which I'm looking very forward to trying out. My mother told me that in the late 50s, she had a Lada sewing machine in the same colors and the same kind of design, so she was certain that the Koyo is also from the 50s. This only added to my fondness for my "new" sewing machine, of course.

In other sewing news, I'm making this dress from the fabric the envelope's placed on:


I intend to finish it this week, so stay tuned :)